How to Create an Icon in Windows 10 [Simplified Guide]
Learn how to easily create an icon in Windows 10
![]() 4 min. read
4 min. read
![]() Updated on
Updated on
Share this article

Improve this guide
Read our disclosure page to find out how can you help Windows Report sustain the editorial team Read more
Key notes
- Adding your own unique desktop icon a great way to customize Windows 10, and creating one is simpler that you think.
- To do that, you just need a create an ICO file using any drawing software, and change them manually.
Windows 10 displays shortcuts on its desktop with icons, which are a significant aspect of the platform’s themes, and you can always change Windows file icons if you want to customize it further.
If you fancy giving Windows a bit of a makeover, customizing desktop icons is an excellent way. You can create your own custom icons for desktop shortcuts. All you’ll need to set up your own icons is one art (or graphic) design application and this guide, so let’s get started, shall we?
What do I need to know before I make an icon?
Before you create an icon, you need to follow the following guidelines:
- Use the proper software – You can create icons in any drawing software, but for simplicity, you might want to use icon maker software instead.
- Set the correct size – Icons require you to use a certain size, and the best results are achieved when using 16x16px, 20x20px, 24x24px, and 32x32px sizes.
- Use the ICO format – All icons require ICO format to work, so be sure to save them in that format. You can also use convert icon software to transform them to the desired format.
How do I make an icon on Windows 10?
1. Use Adobe Illustrator
- Download Adobe Illustrator and install it.
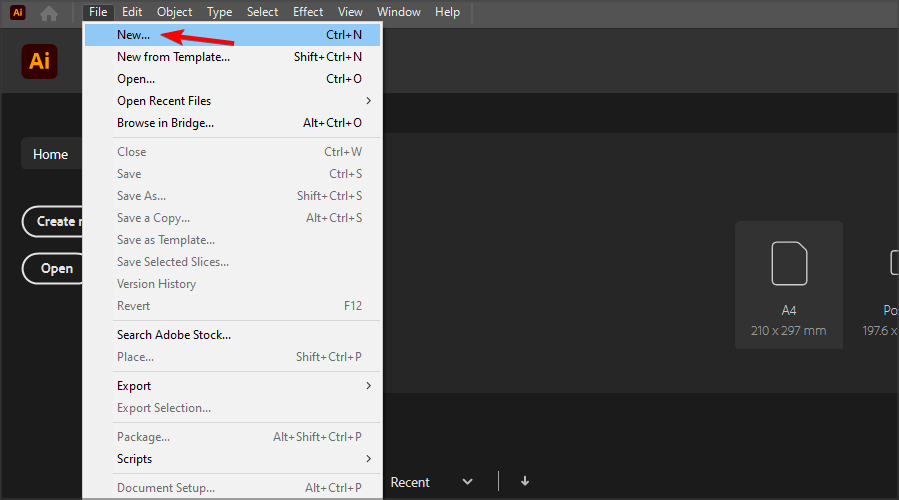
- Go to File and select New.

- Set unit to Pixels and set width and height to 256px. Click on Create.

- Create your icon using the available tools.
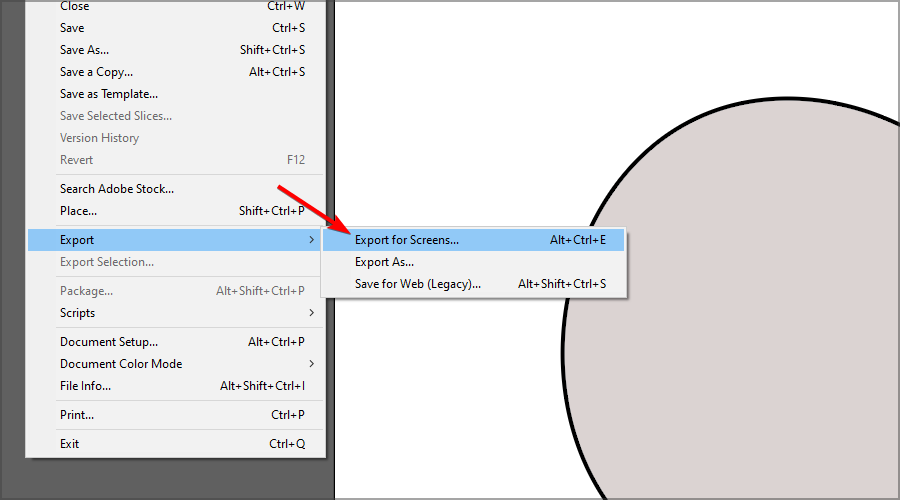
- Once you’re done, go to File and expand the Export section. Select Export for Screens.

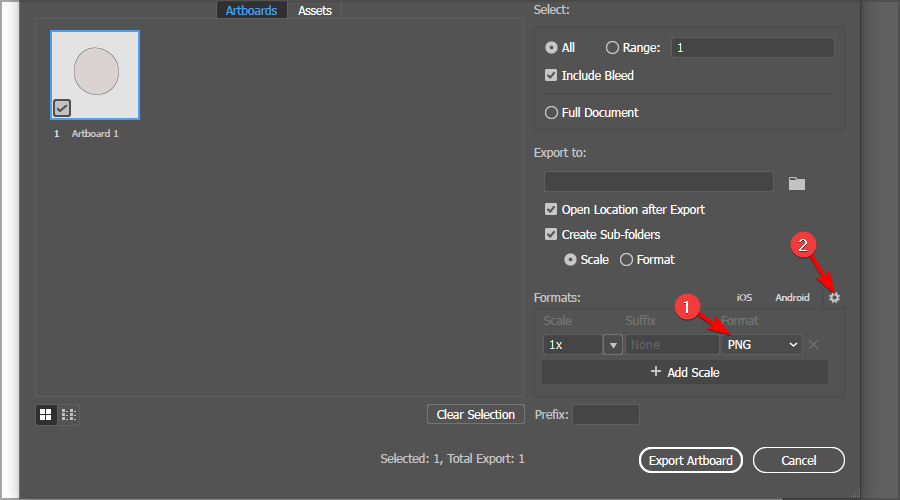
- Set the format to PNG and click the gear icon.
- Change the Background color to Transparent. Click on Save settings.
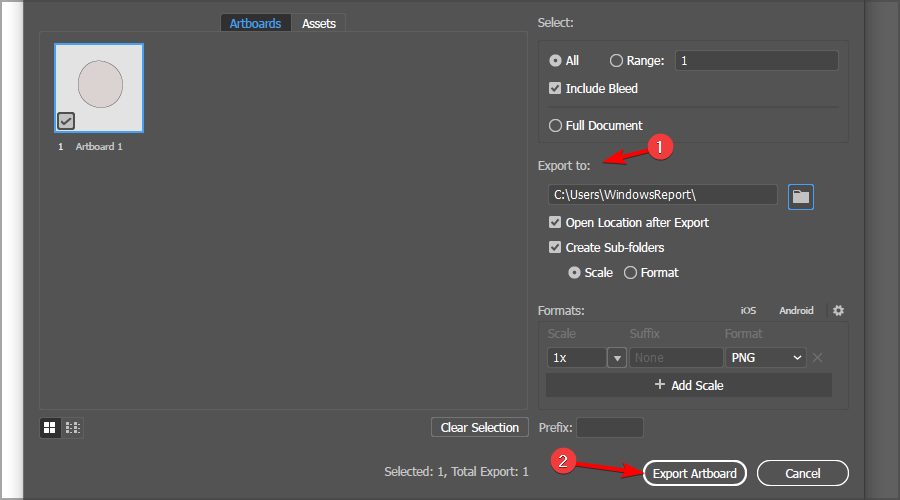
- In the Export to set your save location and click on Export Artboard.

2. Create an icon with Paint 3D
Set up the canvas
- First, click the Start button.
- Click Paint 3D on the Start menu’s software index.
- Click New in Paint 3D.

- Select Canvas to open the options shown directly below.
- Enter 32 in both the Width the Height boxes to resize the canvas to 32 x 32.
- Roll your mouse wheel to zoom in on, and expand the canvas.
- Toggle the Transparent canvas option on.


Design the icon
- You can draw a picture on your icon’s canvas by selecting Brushes. You’ll need to select Marker or Pixel Pen at a 1 px weighting.

- To add lines and two-dimensional shapes, select the 2D shapes tab. Then select a line, curve, or shape option there.
- Paint 3D’s 3D shapes tab includes various options for adding three-dimensional shapes and models to your icon. Click 3D shapes to open that tab.
- Select a 3D object or model option on the sidebar. Then hold the left mouse button and drag the cursor right to expand the selected shape, so it fits within your icon’s canvas.
- Click the shape on the canvas to open its rotation options as in the shot directly below.


Save the icon design as an image
- When you’ve finished your icon design, click Menu and then select Save As. Lastly, choose Image.

- If you added a 3D model to your icon, an image preview will open as in the snapshot directly below. Select PNG on the Save as type menu.

- Press the Save button.
- Select a folder to save the PNG image in.
- Select 2D – PNG as the file format.
- Enter a title for the image, and click the Save option.


How do I convert a JPEG to an icon in Windows 10?
- You can convert PNG, JPEG, and JPG files to icons at the Online-Convert website. So, open that website’s Online image convert page in a browser.

- Click Choose files to select the icon PNG you set up in Paint 3D.
- Press the Start conversion button.
- Then click the Download button.

If you use PNG format, be sure to check our guide on how to convert PNG to ICO on Windows.
As you can see, creating an icon is simple; once you’re done, you just need to change the icon manually. If you don’t know how to do that, we have a special guide on how to change icons in Windows, so be sure to check it out.
Once you’ve created them, you can proceed to delete the shortcut arrow from the desktop icon if you find them annoying.
Also, find out how to save the desktop layout in Windows and never have them change automatically.
What method do you use to create icons? Let us know in the comments below.